The Never Ending Saga of the Primary Bedroom Closet
Guys, this is the space that will never be finished it seems. I wrote a post about the "finished" closet in May of 2020. That's probably the 3rd or 4th update on this space. It's one of the two closets in my primary bedroom. The one that I use. The one that is the most awkwardly laid out. It started out as this when the house was built.


I ripped up the carpet and laid LVP flooring. Then took out those god awful shelves, painted, added new hanging bars to the left and right sides and then created shoe shelves and a hanging rod for longer clothes on the back nook. The shoe shelves have remained the same since doing that but I did change up the right side by adding some of those prefab closet organizers and then the back part I added 2 of them as well.


That photo isn't a good representation. There is another unit on top of that one. But it does show how LITTLE space was now in between the shoes and those units to get to the long hanging items. Under the long hanging items was my laundry basket so I frequently had to squeeze in between the two sides to get at the basket. It was annoying. I can't tell you how many times my arm was stabbed by the corner of the shoe shelves. I was over it. Also the two stacked on the left in the above photo were right under the attic access. So anytime someone needed to get up to the attic, we had to empty those units out, unscrew them from the wall and move them into the bedroom.
So in July when my dad and aunt were here I voiced my frustrations with this space. We AGAIN had to move those two units into the bedroom to gain access to the attic to replace my bathroom exhaust fan. I decided it was time to figure this closet out once and for all.
We started by removing the shoe shelves. Then moved the two units on the left and the two units on the right into the space along the back wall. It left a gap of about 4 inches so my dad ripped a board to fit into that space.


Once this side and the back was completed, I realized I lost my laundry storage and my long hanging clothes rod. So I ended up rearranging the left side nook as well. This one started out with 2 bars just like the above photo. So I removed the bottom bar. At this point I started painting the closet to get rid of that light blue. What color do you think I went with?


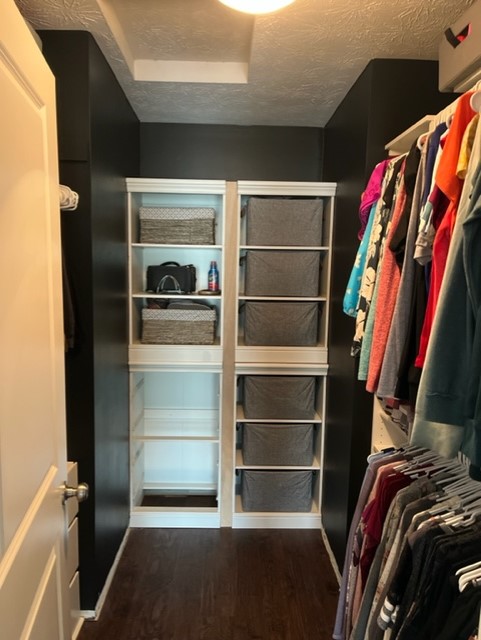
Tricorn Black! My new favorite color. In the above photo you can see the attic access.
I needed some sort of storage for the left side now that I removed an entire rod that was full of clothes. So I bought two smaller drawer units and pushed them together to look like a dresser.


I finished installing the baseboard to the areas that were missing, painted the back unit white, bought some more fabric storage bins, and added a runner. Oh, I also had already changed out the chandelier about a year ago to a brushed gold semi-flush light. The drawer pulls go really well with it.


Love it!!!!
ReplyDelete