Pantry Update
Last time I posted, I said I was going to start on the pantry. After showing some photos of my ideal space and coming up with a rough sketch, I headed to Menards to pick up the wood. There was an "11% rebate on your total purchase" sale going on. So not only did get to use up my last rebate and a Christmas gift card, I will get another $20ish in rebates from this purchase too.
This very nice boy asked me if I needed help as I wandered around the wood aisles. I took him up on it seeing as though half of the wood I needed was upstairs and I'm not too big on heights or walking up high on a metal grate floor. Woosie, party of one. So I read off to him what I needed and he gathered up the supplies like the good little boy he was. He even politely asked if I drew the sketch myself. He was impressed by my straight lines apparently. Too bad he was 16. Too bad I'm not.
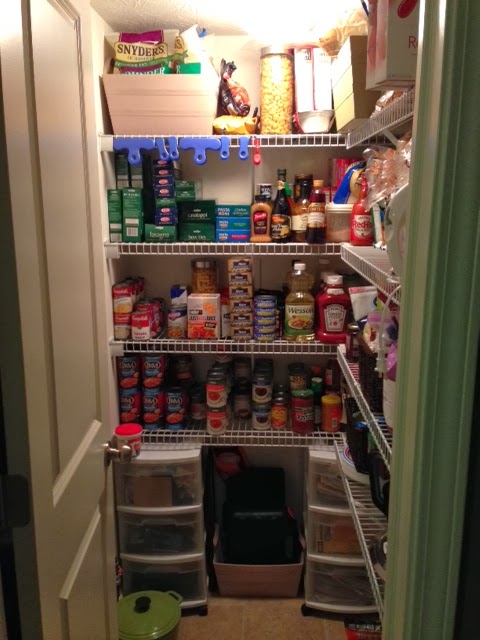
Anyway. Back to my pantry. This is where we started. As you can tell, I like food. Clearly. And I'm a little OCD. No I didn't alter anything in the pantry before snapping the pics. I'm always this ridiculous. But you can see there's not a lot of space. While there are three shelves, there's nothing on the bottom for storage. The plastic carts store some tools and house stuff and those aren't going to stay in the pantry- they'll make their way into the garage shortly. Plus the metal wire shelves are terrible. Nothing sits flush on them and I've already had way too many jars of sauce come crashing down and break all over the floor. Not my idea of a fun time.
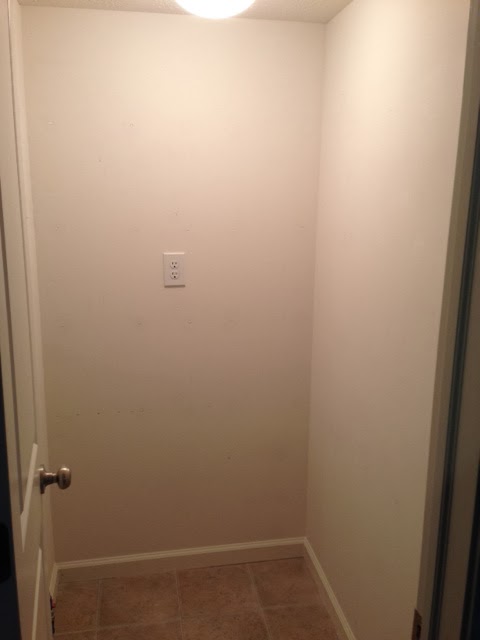
So first thing I did was clear everything out.
I was even pretty surprised to find that I had an outlet in there! What?!?! Then I started removing the shelves. Have I told you how much I hate these damn shelves? This is why.
Sixty-six holes in the walls. From 6 shelves. Talk about ridiculous. Took me a little time to spackle them, sand them, spackle them again and sand them again. But after all was said and done, I had nice, flat walls.
Then came time to paint. I decided on using the same color that I used on the living room dresser/tv stand. It's called Misty Surf. It's in the same color family as the bathroom and laundry room colors so the three rooms blend well together while not being the exact same color. The photos don't do it justice. It's much lighter and less blue, if that makes sense. It's very similar to a light robins egg blue.
Now came time to start building the base for what will eventually be the cabinet portion on the lower half of the room. I picked up a 4' X 8' sheet of oak plywood and had Lowe's cut it to size for me. This sheet covered the base and two shelves on both sides of the room. Plus I had a piece the size of another shelf left over. Score! The base is a 1' X 4' X 8' that I cut myself. Actually the only cuts I didn't do were the plywood. Gotta love power tools!
Then came time for the next set.
This is how I'm supporting the shelves. There will also be decorative brackets under the shelves for additional support but we're not there yet.
I painted the braces the same color as the wall so as not to compete with the shelves. I'd rather they blend in. Then the third shelf, which I'm considering to be more of a counter top was installed. Fast forward some painting and staining and this is what I had.
Check out that wood grain. Hubba hubba. My favorite Dark Walnut stain and then a crisp white on the shelves below. I went deeper at the back, what was there before was 12" deep and the wood shelves are now 19" so I have a bit more room. The side shelves are basically the same depth of 9" because the door molding is there. And see how the braces match the wall color? Basically invisible once the shelves are on them. I should also state that even though I'm putting decorative wood brackets under the shelves for additional support, I have also clamped the back shelves and side shelves together underneath for additional support. I really really REALLY would prefer these shelves to not come crashing down on me. So I might be over exaggerating the support, but I'd rather over do it than have a huge mess on my hands.
I was also able to install the shelves on the back wall as well.
This is what it looks like today. I'm pretty impressed with what I accomplished over the weekend. I definitely didn't think I'd get as far as I did. Two of the three side shelves are already cut and painted, I just haven't installed them. The third shelf was cracked so I'm going to have to bring that piece of wood back to exchange it for a new one. The brackets I bought don't work- as I figured that out tonight when I was trying to put them up. Wicked pissah. I bought them because I liked the simple design of them. But they seem cheap in quality when I tried installing the first one. I wasn't impressed. So back to the drawing board on that. I'm sure I'll find something though. I'm also thinking some metal brackets for under the back bottom shelves, since you wouldn't be able to see the wood decorative ones and they won't jut out as far, taking up valuable space down there.
Once I have the rest of the shelves up, I need to apply a coat of poly to protect the paint from scratches. I also might look for clear contact paper or a clear plastic mat to go on top of them for protection. I bought something before at The Container Store that was meant for the wire shelves that I use in my master closet. So if all else fails, I can go pick up some more of them.
So what do you think so far? I can't wait for the final reveal and to get the food back in there rather than all over my dining and living rooms. My house is a mess right now. This weekend I have an event, so it'll probably be next weekend before I'm able to go pick up the rest of what I need to get it done. The anticipation will kill me for sure.
Here is what I have left to do:
- Finish installing side shelves
- Secure the rest of the shelves together
- Purchase and install decorative brackets for under the upper shelves
- Install heavy duty metal brackets for under the lower shelves
- Put a coat of poly on all of the shelves
- Find some sort of plastic protection for painted shelves
- New light fixture
- Design/create a pull out drawer or basket of sorts for potatoes
- Design/create a few shelves for wine storage
- Find decorative organization baskets/jars


Comments
Post a Comment
Only comment if you are going to tell me how awesome I am. If you don't, I will hunt you down and cut a bitch.