Kitchen Remodel Part 3- Finished Island
The island is DONE! Well, I still need to put the kickboard on it but I'm waiting to do that when I do all of the cabinets. But for now- I'll call it finished.
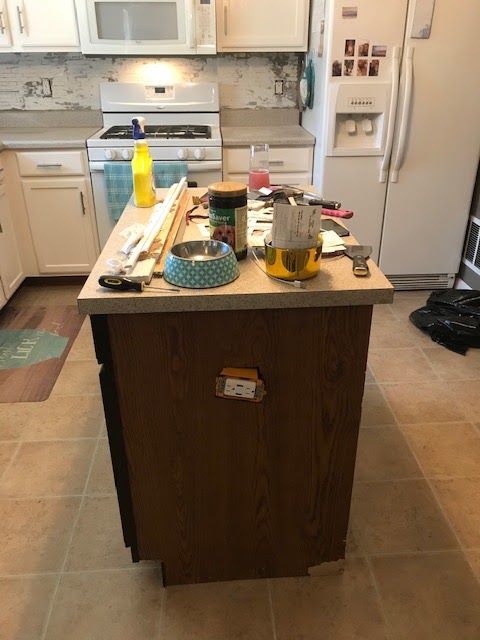
For a refresher- this is what I had.
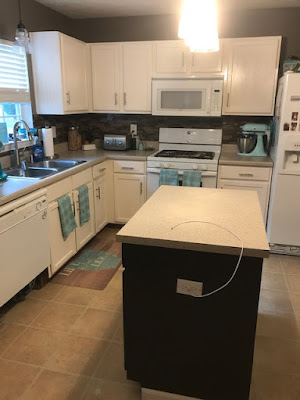

Not sure if you can really see it on the side of the island, but it was beadboard. As I alluded in the first kitchen remodel post, this island has a wood front and then the other three sides were a vinyl peel and stick faux looking wood. So I had to put something on the sides in order to paint and I was given the beadboard. So I slapped that shit on it and painted it espresso brown. And lived with it. For 10 years. So gross.
Way before my dad and aunt told me there were coming out here to visit- I saw this photo on Pinterest and saved it because I was in love with this island. We'll call in my inspiration photo.
 My island is small. Like less than 4 ft wide small. Like less than 3 ft deep small. It's so not functional for the amount of pans I have in there. You'll see that later. So the plan was to make the island larger, get a butcher block countertop since I wasn't redoing all of the countertops and make it exactly the way I wanted it. However, the inventory in the stores had another idea. We shopped around and around and found basically nothing that I could use. I could pretty much make it about 10" wider and spend over $500 for that small amount of extra space. That wasn't worth it to me. I decided to keep the island I have along with the matching countertop that was already there and just redo the sides.
First up was ripping off the beadboard.


Then came time to re-wrap it with luan (thin plywood). This was for a clean surface as well as extra width.


Next came time for the slats. And math. Lots of math.


Basically made out of the same luan with just enough separation to see the individual slats. Then came time for the border.


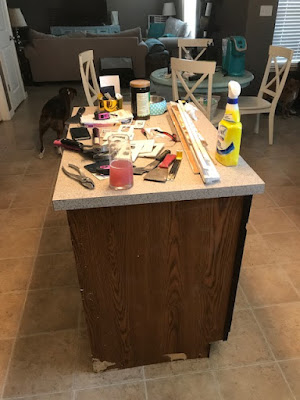
As you can see in the above photo- the front was still brown. We'll get back to that later. Now time to paint the border.


OK so this is how it was when my family left. In July. With the brown front. The brown ugly front.
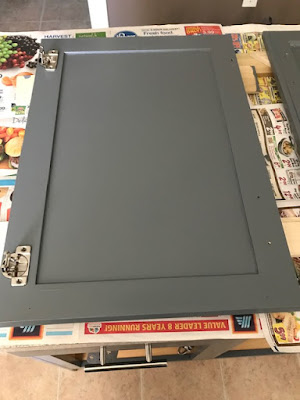
August 4th I apparently couldn't take it any longer. Because I took the doors and drawer fronts off and sanded the front.


Then cleaned it up and painted it gray.

Aside from putting the pots and pans back in, this is how it's remained since August 4th. Guys, over a month and a half ago. So embarrassing. But if I'm being totally honest here, all of my lower cabinets have the doors and drawers off so you can see EVERYTHING in my cabinets. Miss Janie Jane loves sticking her nose in them too. Oy.
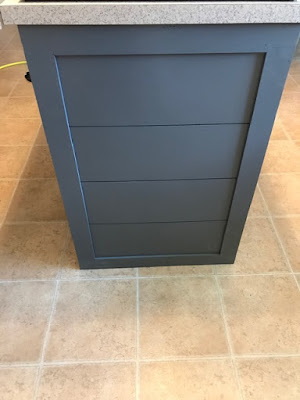
Well this past weekend I finished sanding the island doors and drawer fronts and got a couple of coats on them. Then today I installed them and have my finished island! Woot woot!


I did that intentionally. I wanted a clean look with the border. I think it brings it up to the more modern styles out there right now. I've done the same with the bottom cabinets on the side that is visible. It looks so good.
I'm so happy with this island. Especially with how close we got to the inspiration photo.


Love it. As much as I wanted a bigger island, I love how this turned out. And it saved me over $500 since I'd have done the same bit of work to the new island too. But all in all, this was 2 sheets of 8" X 4" X 1/4" luan- so roughly $30? Probably even less. Then we bought poplar for the border wood- maybe another $30? All in all the island remodel was less than $100 and looks drastically different.
For a refresher- this is what I had.


Not sure if you can really see it on the side of the island, but it was beadboard. As I alluded in the first kitchen remodel post, this island has a wood front and then the other three sides were a vinyl peel and stick faux looking wood. So I had to put something on the sides in order to paint and I was given the beadboard. So I slapped that shit on it and painted it espresso brown. And lived with it. For 10 years. So gross.
Way before my dad and aunt told me there were coming out here to visit- I saw this photo on Pinterest and saved it because I was in love with this island. We'll call in my inspiration photo.

First up was ripping off the beadboard.


Then came time to re-wrap it with luan (thin plywood). This was for a clean surface as well as extra width.


Next came time for the slats. And math. Lots of math.


Basically made out of the same luan with just enough separation to see the individual slats. Then came time for the border.


As you can see in the above photo- the front was still brown. We'll get back to that later. Now time to paint the border.


OK so this is how it was when my family left. In July. With the brown front. The brown ugly front.
August 4th I apparently couldn't take it any longer. Because I took the doors and drawer fronts off and sanded the front.


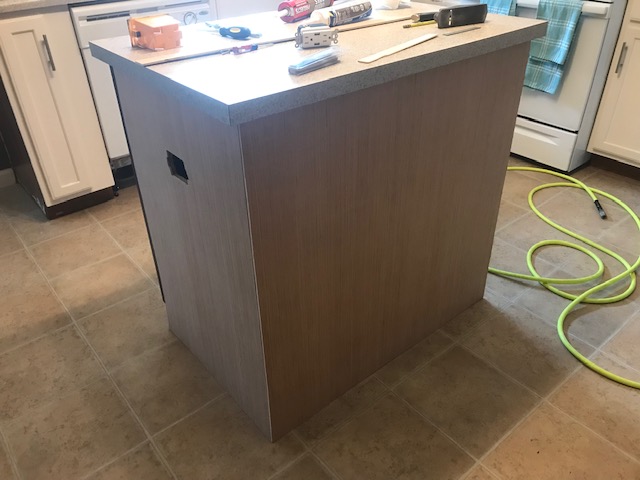
Then cleaned it up and painted it gray.

Aside from putting the pots and pans back in, this is how it's remained since August 4th. Guys, over a month and a half ago. So embarrassing. But if I'm being totally honest here, all of my lower cabinets have the doors and drawers off so you can see EVERYTHING in my cabinets. Miss Janie Jane loves sticking her nose in them too. Oy.
Well this past weekend I finished sanding the island doors and drawer fronts and got a couple of coats on them. Then today I installed them and have my finished island! Woot woot!
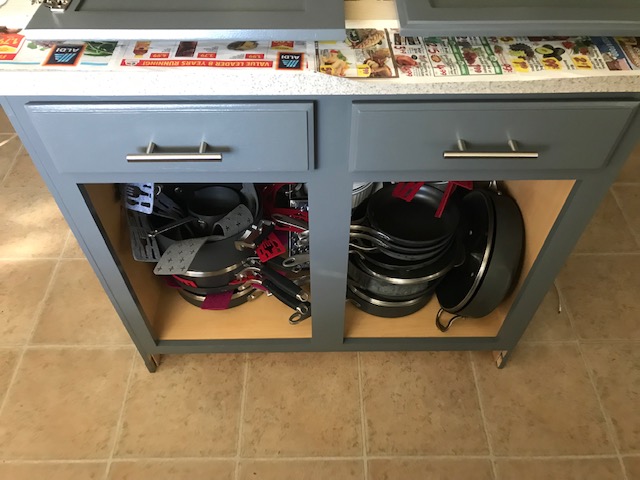


You will notice one thing... see on the sides how the boards go all the way down? Compared to the cut out at the front of the cabinet in the below?

I'm so happy with this island. Especially with how close we got to the inspiration photo.


Love it. As much as I wanted a bigger island, I love how this turned out. And it saved me over $500 since I'd have done the same bit of work to the new island too. But all in all, this was 2 sheets of 8" X 4" X 1/4" luan- so roughly $30? Probably even less. Then we bought poplar for the border wood- maybe another $30? All in all the island remodel was less than $100 and looks drastically different.
Comments
Post a Comment
Only comment if you are going to tell me how awesome I am. If you don't, I will hunt you down and cut a bitch.